
Cleaning and restringing your acoustic guitar is one of those things that many guitarists look forward to. There is just something exciting about the smell and feel of a clean fretboard and polished guitar, and the bright, crisp, clean tone of a brand new set of acoustic guitar strings. Depending on how often and how long you play you will need to change your guitar strings and clean your acoustic guitar anywhere from two to five or more times a year.
Cleaning and restringing your acoustic guitar is a simple procedure and the more you do it, the quicker and easier it gets.
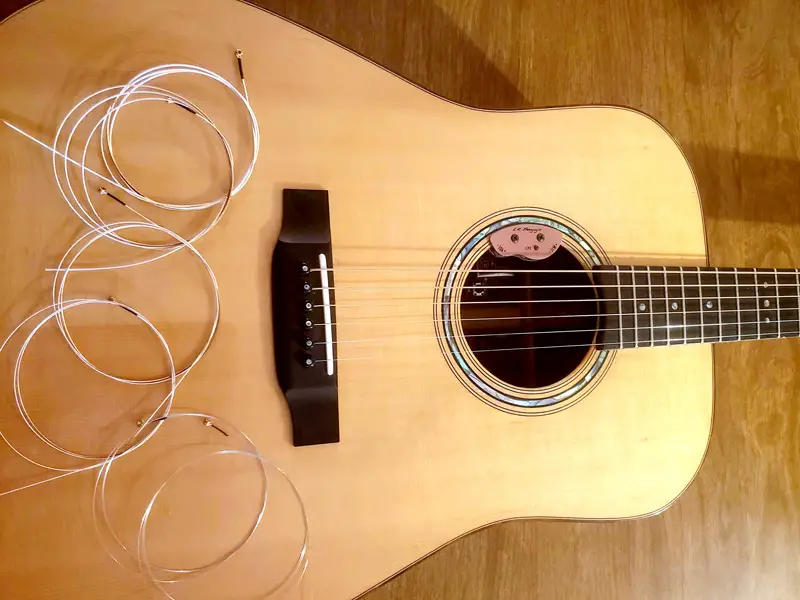
- Remove your old guitar strings by unwinding each one until you can easily remove the string from the tuning machine.
- Then remove each string from the bridge.
- With the strings off, use a clean cloth to remove all the dust and debris from the guitar that will wipe off easily.
- Wet a quarter sized section of the cloth with naphtha (or your preferred guitar cleaner) and wipe the entire guitar body, neck, fretboard, and headstock until you are satisfied with its cleanliness.
- Restring the guitar by putting the strings back in the bridge and winding them back on the tuning machine posts.
Read on for a more detailed description of how to properly wind the strings to help prevent slippage and keep your guitar in tune.
Should you buy new guitar strings?
How many times have we heard people say “they don’t make things like they used to”? Typically they use that phrase because something wore out well before it should have. Most products eventually wear out from normal use, abuse and even the fury-inducing planned obsolescence.
Guitar strings are one of those things that “aren’t made like they used to” but it’s because they have gotten better! They last longer, have more consistent tone and have actually gotten less expensive (more so when inflation is factored in). Guitar strings probably still cost the same as when you were in high school. If you can’t remember how much guitar strings were when you were in high school because of the latter, a new set of guitar strings were about $8 in 1950. I paid $7 for my first set in 1986. Today, a quick look on Amazon will result in many name brand sets (GHS, Martin, Ernie Ball) for $6 and even less if you buy multipacks.
So if you haven’t purchased some new guitar strings yet, you should do so.
Step-by-step instructions to restring your acoustic guitar
Before you can clean your acoustic guitar, you should remove the strings so that you can clean deep into the nooks, crannies, corners and tight spots.
What you will need to restring your acoustic guitar:
- One brand new set of your favorite strings (What acoustic guitar strings are best for beginners?)
- Wire cutters (flush cut is preferable)
- String Winder (optional)
If you haven’t yet stabbed one of your fingers with a high E string, just wait. You will. And then you will have a greater appreciation for flush cut wire cutters. For reference, a light gauge high E string is .010 inches thick, about the same as a 30 gauge insulin needle. Super light and extra super light strings are even smaller (.009 and .008 inches, respectively).
How to restring your acoustic guitar:
 Use your fingers or a string winder to loosen the strings until you can easily remove them from the tuning machines.
- Remove the bridge pins (Hint: most string winders have an integrated bridge pin remover) or untie the strings from the bridge and remove the strings. Set the bridge pins aside in order so the same bridge pin goes back into the same bridge pin hole.
- Remove the strings.
- Clean your acoustic guitar (instructions below).
- Open the package of new strings and lay them out in order of size.
- Beginning with the low E string, remove the string or color indicator sticker if it has one. Use naphtha to remove any sticker residue left behind.
- Place the ball end of the string into the bridge pin hole or insert it into the string hole and tie it off. Replace the bridge pin ensuring the string sits in the slot in the bridge pin.
- Keeping your thumb firmly on the bridge pin to keep it from popping out, pull up on the string to seat it firmly against the bridge plate beneath the bridge.
- Insert the other end of the string into the string hole in the tuning post.
- To get the proper amount of winds, make a fist with one hand and set it pinky finger down at the fifth fret. Pull the guitar string through the tuning post until it rests lightly across your thumb and index finger. Bend the string 90 degrees upward where it exits the tuning post.
 Wrap the string one time over the excess string then wind the remainder below the excess string so as to pinch it between the winds, being careful not to cross the string over itself.
- As you wind the string and it tightens, ensure the saddle is in place and that the string is in the appropriate nut slot.
- Tighten the string till it sounds a tone but do not bring it up to pitch.
- Repeat steps 6-13 in the following order: High E, A, B, D, G. This more evenly disperses tension on the neck and bridge.
- Once all the strings are on the guitar bring it up to tune. As you do so, pull the strings up a couple inches at the 12th fret and wiggle them a bit to help them seat and stretch.
- Once tuned, snip the excess string off as flush as possible with the tuning post.
I do not, ever, under any circumstances, recommend leaving the excess string without trimming them flush to the tuning post. Leaving too much excess string may be the sexy look some guitarists are going for, however, these strings are extremely small, sharp and dangerous. True story – I worked with a famous musician in the 90s whose guitar tech had snagged his eyeball on a poorly trimmed guitar string and lost his sight in that eye. Nothing says “sexy” quite like a milky eye.
In between the steps above, you should clean and polish your acoustic guitar every time you change the strings. As long as you already have the strings off, it is a quick and easy step to give it a real good once over with a cleaner and polish.
How to clean an acoustic guitar:
I use naphtha (pronounced naf-tha or nap-tha) to clean every guitar that comes into my shop. Naphtha is a solvent that is effectively similar to oils, breaking them down and allowing their removal with little effort. It can be purchased at just about any paint, hardware or construction store. A strong solvent such as naphtha is very effective for someone who plays vigorously, sweats a lot and smokes, yet it might be overkill for a classical guitarist who maintains a strict cleaning routine. It is always advised to find the cleaner that works best for you.
Naphtha does an excellent job of loosening up the oils and dirt so it can be easily wiped away. WARNING!: Naphtha is a petrochemical and is extremely flammable and it must be used in a well ventilated area away from open flame.
Naphtha does an excellent job of breaking down the oils that the human body secretes, allowing the sebum and dirt that accumulates in it to be easily removed from your acoustic guitar. It evaporates almost immediately so it will not harm wood or finish and doesn’t leave residue on your acoustic guitar.
What you will need to clean your acoustic guitar:
- Two clean, dry cloths or lint-free shop cloths
- One very soft, lint free cloth or microfiber cloth
- Naphtha or other guitar cleaner
- Polish or wax
Steps for cleaning your acoustic guitar:
 Place one dry cloth securely over the opening of the can of naphtha or your preferred cleaner.
- Tip the can upside down and let a little bit of the cleaner soak into the cloth.
- Use the wetted area of the cloth to wipe down the guitar.
- Pay extra attention to the areas where skin comes into contact with the guitar like the neck and lower bout of the body. This is where sebum (oils excreted from skin) tends to accumulate.
- Using a clean, dry cloth wipe the entire guitar down to get rid of any excess cleaner.
- Apply a small amount of paste wax (Renaissance is my go-to), auto polish (I like Mother’s or Maguiar’s) or guitar polish to the finish.
- Rub the polish in with a very soft, lint-free cloth, let it dry for a few seconds and then wipe it off to bring out a freshly polished, bright finish.
Maintaining a cleaning routine helps prevent oils, skin, dander, sweat and other fluids from drying and building up on your acoustic guitar and reduces the need for heavier cleaning. However, even with the most diligent routine there will come a time you will need to use a cleaner and polish on your guitar. I find that the best time to do this is when you change your strings as they already have to come off the instrument.
