
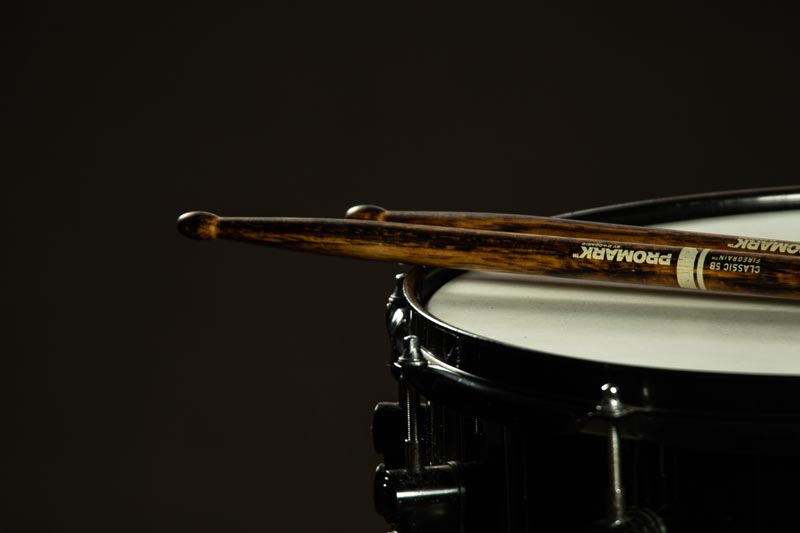
Although the variety and quality differential of drumsticks is astounding, sometimes that perfect set is one that needs a bit of tweaking to really fit your needs. But, when the idea to sand your drumsticks to perfect them arises, you may find yourself unsure of how to sand your sticks and why you would want to in the first place.
Putting it simply, sanding your drumsticks can be beneficial because it removes the finish from your sticks, can remove any chips over time, and can also help you to keep hold of your sticks or have a sharper sound depending on how you sand them and what type of stick you plan on sanding.
The best way to sand your drum sticks is to use a standard belt sander to only sand off exactly what you need—no more, no less. To simply remove the finish on your sticks, try sticking with a handheld sander or sanding manually as this will allow you to control how much is taken off easier. If you sand too much, you will likely break your sticks quicker and be unable to hit your drums as hard as you normally would.
If this alone doesn’t truly answer your myriad of drumstick sanding questions and concerns, fortunately we have taken into account every common concern and question below to ensure that every drummer finds what they need in this article and much much more.
 Benefits of Sanding Sticks for Drummers
There are multiple reasons that a drummer would sand their drum sticks and all of them have unique benefits and potential cons as well. The main reasons for drumstick sanding include wanting to remove the finish on your sticks, wanting to make your drumsticks quieter by smoothing out the tips, and wanting to sand down certain parts of your sticks to hold them in different hand positions easier.
For starters, let’s take a look at the benefits of sanding off the finish on your new drumsticks. Although it may provide a small difference in sound, the main benefit of removing the finish is simply to create a better grip and to have sticks that are easier to hold even when your palms become sweaty.
Similarly, the benefit of sanding down certain parts of your stick to better fit your hands if you use unique hand positions or styles works in the same ways. No matter how sweaty your hand becomes when playing, creating those grooves will allow you to hold on far longer. According to Electronic Drum Advisor, sanding your sticks to create a better grip is also a great way to avoid blisters on your fingers which is a huge problem for many drummers out there.
Lastly, the benefit of sanding the tips down in order to make your drum sticks less abrasive is mostly for slow songs, indoor performances, or other situations in which you would need less of a ‘ping’ and more of a dull tone.
How To Sand Your Drum Sticks
The best way to sand down your drum sticks is to either use a sanding belt, a hand sander, or sandpaper manually. It all depends on what you are trying to accomplish.
Hand sanders are perfect for creating grooves to grip onto while manual sanding is ideal to remove finishes as it never takes off too much. A belt sander is perfect for those looking to sand the tips or remove chips in the sticks that could become larger over time. You can find these at your local hardware store like Home Depot or Lowes, or online through Amazon.
To use the sanding belt or hand sander, make sure you have on both safety goggles and gloves so you don’t accidentally hurt yourself. You may also want to wear a face mask depending on the sanding job you are performing as the wood particles are not particularly good for your lungs. Once you have sanded down your sticks, you can also finish off the process by using an instrument lemon oil so they will not be slippery and will also treat whatever wood your sticks are made of.
Why do my Drum Sticks Keep Breaking?
Another very common question that drummers ask often is why their drumsticks of choice continuously break on them. The reason is almost always because of the positioning of the drums themselves and the frequency in which the drummer hits the metal rim because of it. If the drummer is one that has to do lots of fills or rapid and hard drum progressions, they are bound to hit the rim quite often when the drums are in a less than adequate position. This causes some points to be weaker than others over time which leads to chips, internal breaks, and finally, full breaks.
The best way to prevent this is to make sure that all of your drums are in a good position that is flat and not prone to rim hitting. This will prevent weak spots which will eliminate this problem.
However, there is also a chance that the sticks you are using are not made of a quality material which, depending on the style you play, could significantly affect their longevity. The best drumstick materials are without a doubt hickory, oak, maple, and synthetic. Hickory is great for shock absorption, oak is one of the most sturdy materials for sticks, maple is lightweight which makes it perfect for complex drum beat patterns, and synthetic sticks made of metal or plastic are mostly used for sound control and are better suited for recordings and lighter performances.
If you are worried that the material your sticks are made out of is not adequate, your best bet is to turn to one of the materials above as they are the most durable, absorbent, and effective materials on the market.
Nylon VS. Wood Tip: Which is Best?
Now it’s time for one of the most debated topics for drummers of all time—which drumstick tip material is best? To start, let’s outline the benefits of using the traditional wood tip drumsticks. Wood tips have a richer sound both on the drums as well as the cymbals. They are great for both jazz and rock/ metal alike. They also are highly effective for snare rolls and sound far better on toms making them a better-sounding choice all-in-all.
However, while they do create a great sound with less vibration in your cymbals and drums as a whole, they also can’t stand the test of time as effectively as nylon tips can. Nylon tips were introduced to the world in 1958 by Regal Tip’s innovator Joe Calato as he noticed that high quality sticks were being cast away solely because their tips had been chipped or damaged far too often.
This is why the nylon tip is used more often by those that play heavier music and care not about the deeper and richer tones wood tips provide but rather the longevity of their drumsticks and their ability to handle their heavy hitting performances. As they don’t ever chip and they respond better to cymbals and metal rims than standard wood tip drumsticks, they are a favorite in the metal and hard rock drumming community and are also used often by those that are on tour because they last much longer than traditional drumsticks would.
With this being said, the choice between nylon and wood tip drumsticks is truly all about preference and necessity. If you prefer deeper tones and don’t mind buying sticks more often, wood is the right choice for you. If you need your sticks to last longer and handle harder blows, nylon is where it’s at.
In Conclusion
Now that you know exactly how to sand your drum sticks for playing technique, all that’s left is to put this useful information to play. Make sure to check out our articles on taking care of your drums or or if you need some cleaning supplies, make sure to check out our recommended supplies for drums.
Happy playing!