
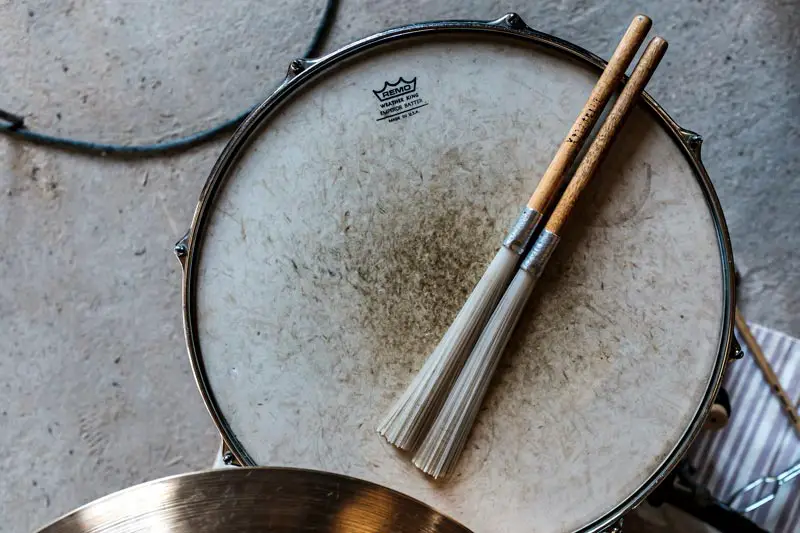
Many consider the snare drum as one of the most important drums since it is the center of the drumkit and has so much versatility, often holding the backbeat. With this one piece of your drum set holding so much power, it’s no wonder why many drummers are both scared and determined to properly clean their snare drum heads and keep them in perfect condition. But, how do you actually clean your snare drum head properly and what are the overall sound benefits of cleaning your drum head appropriately after all?
The best way to clean your snare drum head is to use a small amount of water, Simple Green cleaner, or Windex on a lint-free cloth. Do not apply the liquid directly to the drum head but rather to the cloth, and sparingly. Then, apply it in a circular motion and let it air-dry. If the drum head is a coated white head, you may experience a bit of coating flaking but this is completely normal and expected so don’t panic.
For a better breakdown of this process as well as some unique facts about the snare drum’s origins and how cleaning them affects their sound, let’s analyze the pros and cons of cleaning your snare drum head, read on!
 The Pros and Cons of Cleaning Your Snare Drum Head
Although it may seem like a no-brainer to clean your snare drum heads, not all drummers agree. In fact, some drummers swear that ‘dirty drums’ are the key to professional and deep tones in the recording studio.
So what is the main reason to clean your snare drum head specifically? Well, the answer is simply that snare drum heads can actually sound crisper and more pronounced the more often you clean them. If you are doing rock, metal, or other hardcore drums-heavy music genres, having a crisp and clear snare is essential. However, if your music is more understated such as blues or folk, you may want to steer clear of cleaning your drum heads altogether for that toned-down rich sound.
The main con of cleaning your snare drum head is that, if you use corrosive chemicals, you could warp your drum head or even destroy it. If you are not careful and use the wrong cleaning supplies such as ammonia products, you can affect not only the sound but the longevity of your snare drum guaranteed. So make sure to use the right cleaner!
With that in mind, cleaning your snare remains to be one of the best ways to actually better the sound of your snare and also ensure its cost-effectiveness likewise. However, this is where the cleaning process breakdown comes into play.
Step-by-step Instructions on How to Properly Clean Your Snare
When cleaning your snare drum head, start with the full snare itself. Use a non-ammonia cleaner such as Windex, 409, or even a 50/50 mix of vinegar and water to clean off the wood and metal parts of your snare drum.
Next, take a lint-free cloth, apply your snare drum cleaner which can be as simple as water or as complex as Simple Green (although Windex is truly best for both clear and coated white heads) to the cloth itself, and then apply in a circular motion working outwards on the drum head itself.
You may see some coating flakes if it is a coated white snare drum head. However, this is nothing to be worried about whatsoever. Be sure to not apply too much of the cleaner and never put it directly on your drum head as this will warp the head significantly.
You may also want to clean off the snares themselves by throwing the snare strainer off and wiping them lightly with a metal polish like Simichrome and Windex for dirt or rust buildup. Afterwards, use a lubricating oil such as 3-in-One multipurpose oil on the snare strainer and tension rods. This is where the sound can be most affected.
 Does Making Them Shine Again Help Their Sound at all?
One of the most commonly asked questions regarding snare drum head cleaning is whether or not cleaning the snares drums actually affects the sound of your snare.
While most of the sound quality comes from the tuning of your snare and the precision in which you do so, allowing your snare drum to ‘gunk up’ can also cause it to sound dull. Cleaning them monthly is a good way to keep them sounding crisp.
Crisp is good but sharp is not. Make sure to not overtighten or clean with corrosive cleaning or polishing chemicals as these can lead to that sharp sound that is loathed by almost all drummers and recording studios alike.
Why is the Snare Considered the ‘Most Important’ Drum Set Piece?
According to Drumming Review, “A great drummer can make a terrible band sound good, just as a great snare drum can make a poor drum set sound great.” The truth is that a snare drum truly is the glue that binds every drum set and good drum track together. In fact, the same article goes on to also say, “While there are a plethora of different types of drums you will encounter in your career (whether hobby or professional), there does seem to be one drum that is at the heart of Western music: the snare drum. Generally, a student learning drums and percussion in the West will spend a minimum of two years on the snare drum alone before moving on to the drum set and other percussion.”
With this being said, the main reason that the snare is considered the most important piece of a drum kit is because of its position in western music and its power to truly make any song pop if used correctly. It is also a very versatile drum piece as the attack and ‘crack’ of the snare can easily be altered to match the genre and the sound of the song itself.
Top 3 Snare Drum Origin Fun Facts That Will Blow Your Mind
Now that you know more about the snare’s position in western music and the proper ways to clean it in order to keep its sound quality intact, you may be curious to know more about the origins of this unique drum set piece overall. Fortunately, these next three fun facts answer exactly that and more.
- The Snare Drum Was Originally Called the Tabor
Originating from Swiss and Ottoman war battle cries, the ‘Tabor’ was a big drum with a leather strap worn on the front of the player in the early 1400’s to let the opposing side know they were coming.The ‘Tabor’ was made from calf skin, wood, and rattling metal or sheep intestine. This soon transformed into tightly strung metal wires attached to a metal thin drum and was used for classical music or the military. It wasn’t until the 1900’s that the snare joined the modern drum setup in fact and yet now, it is considered the most important drum kit piece for its unique sound and power.
- The Term ‘Snare Drum’ Refers to the Metal Wires on the Bottom of the Drum Which are Called ‘Snares’
Although many people confuse the snare drum itself with the snares that give it its name, the truth is that the snare drum only refers to the metal wires that are attached to the bottom giving this drum its powerful attack. Without those wires, it would be nothing more than another tom.The metal snares we now see were first introduced in the 1500’s and were tightened to no longer rattle during this time giving this drum its iconic snapping sound. However, it wasn’t until the 1800’s that the snare became far thinner and made out of metal. This is when the first prototypes of the modern snare came to be.
- ‘Snares’ Were Originally Made of What is Called ‘Catgut’
The final fun fact about the snare drum isn’t really all that fun but is certainly unique. The original snares from the 1400’s to the 1700’s were actually made using what is often referred to as ‘catgut’ instead of metal snares. Although the name isn’t pleasant, the truth is that cat guts were never the material used but rather sheep and cow intestines. It is hypothesized that the term comes from ‘cattle guts’ specifically.While ‘catgut’ was used for the snares during this time period, it was also used for strings of instruments, tennis racquets, sutures, harps, and even bow strings. This made it a very versatile material during this rudimentary time in our history.
In Conclusion
With a better understanding of the origins of your snare itself and how to properly clean your snare drum heads without damaging them or negatively affecting their sound, all that’s left is to take this new information and use it to your benefit. For more drum cleaning tips and tricks, be sure to check out our other drum cleaning and maintenance articles today!